
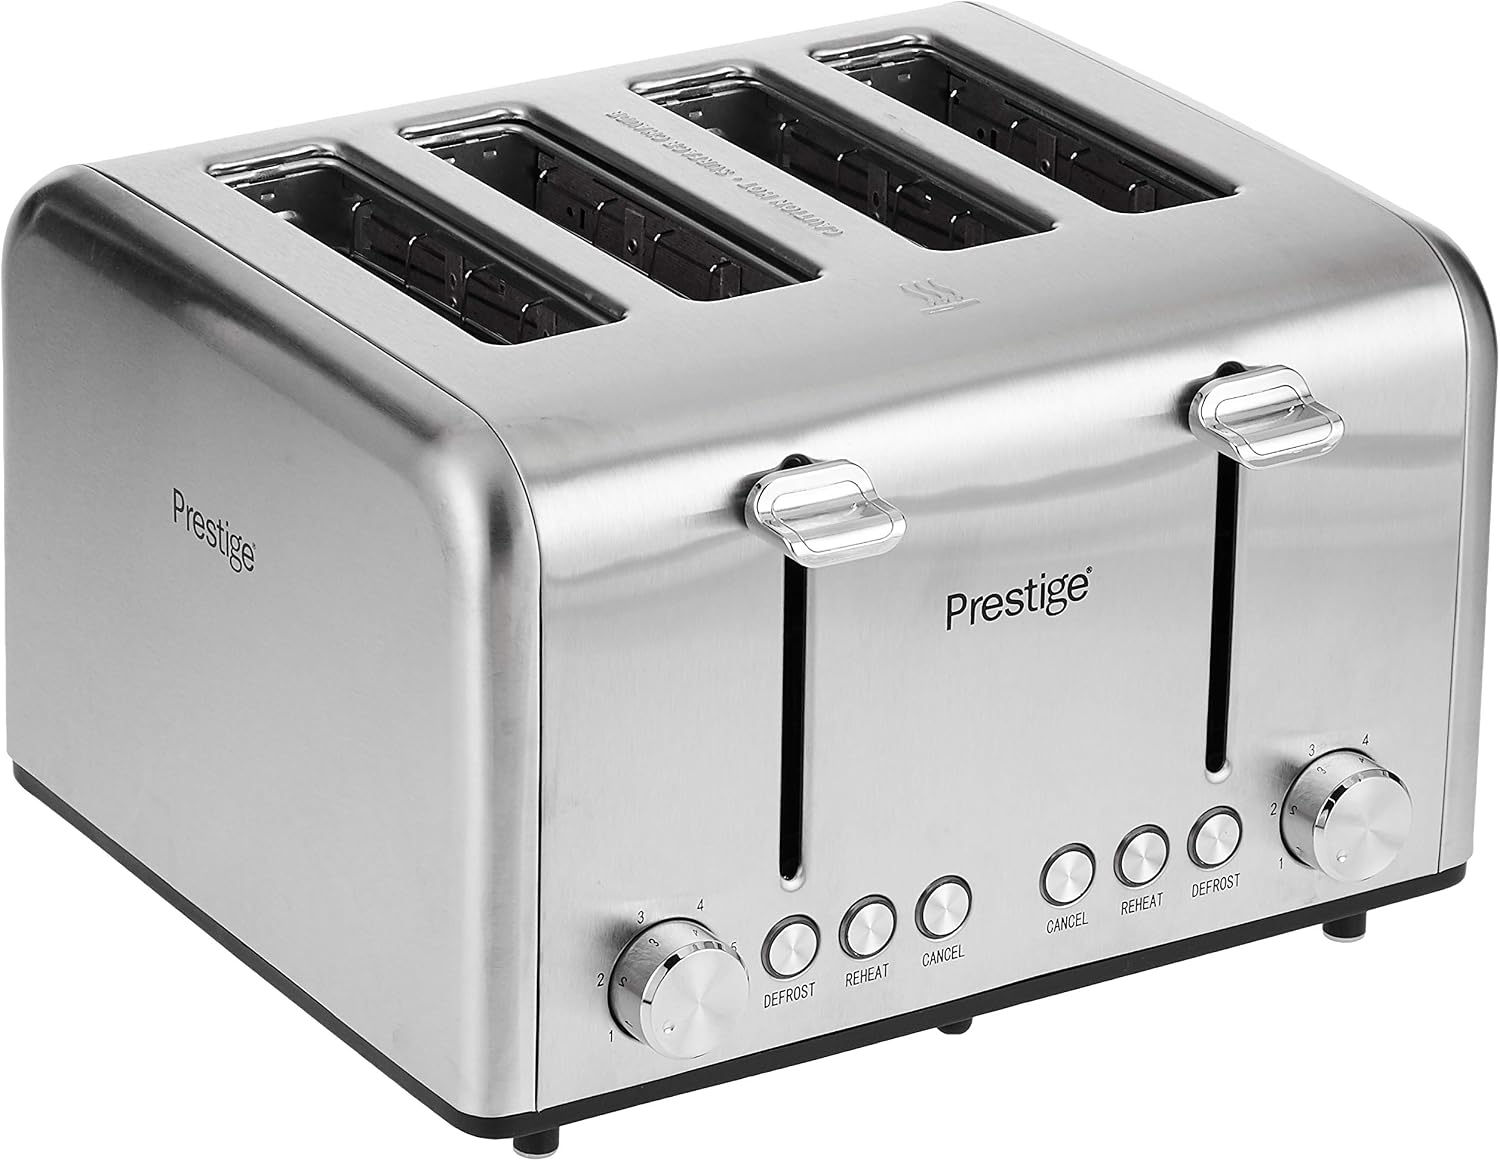
How To Manufacture A Toaster: Step-By-Step Guide
A toaster is manufactured by combining a heat-resistant enclosure, electric heating elements, a spring-loaded carriage, control parts, and safety systems. In the United States, a commercial toaster maker must design for household electrical safety, use controlled factory processes, test finished units, and meet applicable certification and labeling rules.
This guide explains the full toaster manufacturing process, from product design and material selection to assembly, quality control, packaging, and compliance. It focuses on factory production rather than home fabrication because a toaster connects directly to hazardous line voltage and can create fire or shock risks if built incorrectly.

What Is a Toaster Made Of?
A toaster contains several systems that work together: the heating system, bread carriage, control system, outer body, and electrical protection parts. Each system must tolerate heat, repeated movement, crumbs, and daily use.
| Toaster part | Common material or component | Main purpose |
|---|---|---|
| Heating element | Nichrome resistance wire on mica support | Converts electricity into heat |
| Heating support | Mica sheet or another heat-resistant insulator | Holds the element away from conductive parts |
| Inner frame | Plated or stainless steel | Supports the slots and reflects heat |
| Outer shell | Stainless steel, painted steel, aluminum, or heat-resistant plastic | Protects the user and internal parts |
| Bread carriage | Steel frame, springs, and guides | Lowers and raises the bread |
| Control system | Timer, electronic control board, switch, or solenoid | Controls heating time and carriage position |
| Thermal protection | Thermal fuse, thermostat, or cutoff device | Limits dangerous overheating |
| Cord and plug | Listed power cord set | Connects the toaster to a U.S. wall outlet |
| Crumb tray | Stainless steel or plated steel | Collects crumbs for removal |
| Feet and knobs | Silicone, rubber, or heat-resistant plastic | Improve grip and user control |
The heating element is usually made from nichrome, an alloy chosen because it has high electrical resistance and remains stable at high temperatures. The element is commonly supported on mica, a mineral-based electrical insulator that can withstand heat without melting like ordinary plastic.
A toaster also needs a safe path for heat to escape. The inner structure must keep hot elements away from the outer shell, wiring, control board, and user-accessible surfaces.
How Does a Toaster Work?
A toaster turns electrical energy into heat through resistance. When current flows through the nichrome element, the element resists that flow and becomes hot. The hot element then transfers energy to the bread by radiation and convection.
The basic operating sequence is:
- The user places bread into the slot.
- Pressing the lever lowers the carriage.
- The carriage engages a switch or control circuit.
- A timer or electronic controller sends power to the heating elements.
- The elements heat the bread for the selected time.
- The control system cuts power.
- A spring lifts the carriage and the toast.
Many modern toasters use an electromagnet or solenoid to hold the carriage down during the heating cycle. When the timer ends, the magnet releases the carriage. Other models use a mechanical latch, a thermostat, or a combination of mechanical and electronic controls.
A toaster does not need a complex temperature-control system to brown bread. In many models, the browning control mainly changes the heating duration. The actual result also depends on bread moisture, slice thickness, starting temperature, and the condition of the heating elements.
A simple heating calculation
A designer can estimate the electrical load with:
[
P = \frac{V^2}{R}
]
Where:
- P is power in watts
- V is supply voltage
- R is total resistance in ohms
For a hypothetical 1,200-watt toaster operating on a nominal 120-volt U.S. supply:
[
R = \frac{120^2}{1,200} = 12\ \text{ohms}
]
This is only a simplified design example. Real products must account for cold resistance, temperature changes, multiple elements, tolerances, inrush behavior, and the actual rated supply conditions.
Step 1: Design the Toaster for Safety and Production
Manufacturing starts with a product design that defines the toaster’s power rating, slot size, control method, materials, service life, and target cost. Engineers create drawings, circuit diagrams, three-dimensional models, and test plans before production begins.
The design must answer several practical questions:
- How many slices will the toaster hold?
- Will it toast thick bread, bagels, or frozen food?
- How much electrical power will it use?
- How will the user remove stuck bread?
- What prevents the heating element from touching the shell?
- What happens if the timer fails?
- How will crumbs leave the heating chamber?
- Can the unit withstand repeated lever cycles?
- Which parts can become hot during normal use?
- How will the factory inspect hidden connections?
Designers usually build early prototypes before tooling begins. These prototypes help reveal uneven browning, excessive surface temperature, noisy mechanisms, weak springs, poor crumb access, and control failures.
A good design also considers design for assembly. Parts should fit in one clear direction, fasteners should be easy to access, and connectors should resist incorrect installation. Reducing unnecessary part variation lowers assembly errors and makes quality checks easier.
Prototype testing
Prototype units may undergo:
- Heating and browning tests
- Bread-jam tests
- Empty-operation tests
- Repeated lever-cycle tests
- Drop and impact tests
- Cord-flex tests
- Abnormal-operation tests
- Surface-temperature measurements
- Electrical leakage and insulation tests
- Crumb and contamination tests
A prototype that works once is not ready for mass production. The design must remain safe after repeated heating cycles and mechanical use.
Step 2: Select Materials and Qualified Suppliers
A toaster factory purchases parts from approved suppliers or produces them in-house. Supplier selection should consider material quality, traceability, dimensional control, and the supplier’s ability to maintain the same specification over time.
Heating elements
Nichrome wire is formed to a specified diameter, resistance, length, and shape. The resistance must remain within the design range so that the toaster does not draw too much or too little power.
The element may be:
- Stretched across a mica panel
- Wound around a ceramic or mica support
- Held in a stamped metal frame
- Arranged in separate upper and lower heating zones
The element must remain mechanically stable. Vibration, repeated heating, and bread impact should not cause it to sag into another part.
Metal parts
Factories commonly use sheet metal for:
- Inner walls
- Heating-element frames
- Bread guides
- Carriage parts
- Crumb trays
- Brackets and shields
Sheet metal may be stamped, bent, pierced, plated, or painted. Stainless steel can resist corrosion and provide a clean appearance, while plated steel may reduce cost.
Plastic parts
Plastic is useful for knobs, handles, feet, spacers, and external trim. Parts near the heating chamber need a suitable heat rating. Ordinary consumer plastic cannot be placed close to a heating element unless the design and material specification support that use.
Electrical parts
Switches, wires, terminals, fuses, connectors, and circuit boards must be selected for the expected voltage, current, heat, and mechanical movement. A wire that works in a cool appliance may not be suitable near a hot heating chamber.
Each approved part should have:
- A defined part number
- A material or performance specification
- A supplier record
- A revision level
- An inspection method
- A traceability plan
Step 3: Make the Heating Elements
Heating-element production begins with wire preparation. The factory cuts or forms the resistance wire to the required length and shape. Workers or automated machines then mount the wire on mica or another approved insulating support.
The process may include:
- Cutting wire to a controlled length
- Forming loops, bends, or straight sections
- Checking resistance
- Attaching the wire to its support
- Adding terminals or connection points
- Installing the support into a metal frame
- Inspecting spacing and alignment
The heating wire must not touch grounded metal parts. The support must also resist cracking during assembly and thermal cycling.
Factories often perform a resistance check before the heating assembly moves to final assembly. This early check catches wrong wire lengths, broken connections, and poor terminal joints before more labor is added.
The element may receive a controlled conditioning cycle. This process heats the part under monitored conditions so the factory can identify early failures, loose connections, or visible instability. The exact procedure depends on the design and the manufacturer’s quality plan.
Step 4: Form the Toaster Housing and Internal Frame
The housing gives the toaster its shape and protects the user from internal parts. It also affects airflow, heat transfer, appearance, and assembly time.
A typical metal housing process includes:
- Cutting sheet stock
- Stamping or laser cutting openings
- Bending the shell to shape
- Forming slot edges and mounting points
- Deburring sharp edges
- Applying a finish if required
- Inspecting dimensions and surface quality
The inner frame usually contains slot guides, supports for the heating assemblies, and mounting points for the carriage. These parts must align accurately so that bread enters and leaves without rubbing against hot components.
Sharp edges are a major manufacturing concern. Workers can suffer cuts during assembly, and exposed edges can damage wires or insulation. Manufacturers may use folded edges, protective sleeves, deburring, or secondary forming to control this risk.
The outer surface must also remain within safe temperature limits during normal use. A polished metal shell may look attractive but can transfer heat differently from a painted steel or insulated plastic shell.
Step 5: Build the Bread Carriage and Control Mechanism
The carriage moves the bread into the heating chamber and raises it after the cycle. It usually includes a lever, frame, spring, guide, latch, and electrical actuator.
The factory must control:
- Lever travel
- Spring force
- Carriage alignment
- Slot width
- Latch engagement
- Release timing
- Friction at guide points
- Clearance from heating elements
The carriage should move smoothly but should not drop freely or jam. It must hold the bread at a repeatable position so that both sides toast evenly.
A mechanical timer may use a spring, cam, bimetal part, or thermal mechanism. An electronic model may use a control board, buttons, sensors, and a switching device. Regardless of the method, the design needs a reliable way to stop heating if a control part fails.
The control knob or button must also match the actual operating range. If the markings suggest a precise browning level but the design only provides a rough time change, the user experience may be inconsistent.
Step 6: Assemble the Electrical System
Electrical assembly connects the cord, switch, heater, controls, and protective devices. This stage requires strict process control because a loose terminal or damaged wire can create shock, overheating, or fire hazards.
A typical assembly sequence may include:
- Install the cord strain relief.
- Route wires through approved channels.
- Attach terminals or connectors.
- Mount switches, controls, and protective devices.
- Connect the heating assemblies.
- Secure wires away from hot and moving parts.
- Inspect wire routing and terminal engagement.
- Check continuity and grounding paths where applicable.
The strain relief prevents the power cord from pulling directly on internal electrical connections. Wires should have enough slack for assembly but not so much that they can touch heating elements or moving parts.
Connections may use crimped terminals, welded joints, screws, or approved connectors. Each connection method needs its own process check. For example, a crimp may require controlled tooling and periodic pull-force checks.
Workers should not rely only on visual inspection. A connection can look correct while having poor electrical contact. Automated electrical tests are used to find hidden faults.
Step 7: Install the Crumb Tray, Feet, Controls, and Exterior Parts
After the main internal systems are assembled, the factory adds user-facing parts. These may include the crumb tray, knobs, buttons, lever, feet, labels, and exterior shell.
The crumb tray should slide in and out without excessive force. It must also remain secure during normal use. A tray that is too loose can fall out, while one that is too tight may discourage cleaning.
Controls should be checked for:
- Correct position
- Clear markings
- Smooth movement
- Proper return action
- Good fit on the shaft
- Resistance to heat and cleaning products
Feet help keep the toaster stable and create clearance below the base. They should not block required ventilation or allow the toaster to rock on a flat counter.
At this stage, the factory also checks cosmetic quality. Common defects include scratches, dents, uneven paint, loose trim, poor label placement, and fingerprints. Cosmetic inspection does not replace safety testing, but it helps prevent damaged units from reaching customers.
Step 8: Test the Finished Toaster
Every finished toaster should pass a defined inspection plan before packaging. Testing normally includes both electrical checks and functional checks.
Common electrical tests
Depending on the design and applicable requirements, a factory may perform:
- Continuity testing
- Grounding or protective-earth testing
- Dielectric withstand testing
- Insulation-resistance testing
- Leakage-current testing
- Power-consumption testing
- Polarity or wiring checks
These tests must be performed with suitable equipment and trained personnel. They are not safe substitutes for casual inspection or home testing.
Common functional tests
A production test may verify that:
- The carriage engages correctly.
- The heater turns on and off.
- The timer operates within its allowed range.
- The carriage releases at the end of the cycle.
- The lever does not stick.
- The controls match the markings.
- The crumb tray fits correctly.
- The toaster does not produce abnormal noise or odor.
- The power draw is within the production limit.
Manufacturers may test a sample of each batch for browning performance rather than toast every unit with bread. Sampling plans must be statistically justified and supported by process controls.
Example production test table
| Test | Purpose | Typical result |
|---|---|---|
| Visual inspection | Finds damaged or missing parts | No safety or cosmetic defects |
| Resistance check | Confirms heater and wiring values | Within approved limits |
| Functional cycle | Confirms lever, heater, and timer operation | Complete cycle without sticking |
| Leakage or dielectric test | Checks insulation safety | Passes the approved limit |
| Power check | Finds incorrect heater or wiring | Within rated production range |
| Label inspection | Confirms required information | Correct label and model details |
A failed unit should be isolated and recorded. The factory should identify the cause before rework. Simply resetting or passing a failed unit without investigation can hide a larger process problem.
Step 9: Verify U.S. Compliance and Product Markings
A toaster sold in the United States must meet applicable product safety, electrical, labeling, and consumer-product requirements. The exact obligations depend on the product design, sales channel, state rules, and certification path.
Manufacturers commonly work with a recognized testing laboratory or certification body. UL 1082, the standard for household electric cooking and food-serving appliances, is one relevant safety standard for products in this category. The applicable edition and certification requirements must be confirmed for the specific product.
A manufacturer may also need to consider:
- Nationally Recognized Testing Laboratory certification
- Federal Trade Commission labeling rules
- Consumer Product Safety Commission requirements
- State chemical and product rules
- California Proposition 65, where applicable
- Import and customs documentation
- Cord-set and plug requirements
- Traceability and recall procedures
A certification mark should never be added merely because a product passed an internal factory test. The manufacturer must obtain approval through the proper certification process and use the mark according to the certification body’s rules.
Product labels may include the model number, rated voltage, frequency, wattage, manufacturer information, safety warnings, and certification markings. The label must match the tested product configuration.
Step 10: Package and Ship the Toaster
Packaging protects the toaster from impact, moisture, abrasion, and contamination. It also carries instructions and safety information.
A typical packaging process includes:
- Clean the toaster.
- Check the cord and exterior.
- Place the unit in a protective bag or sleeve.
- Add molded pulp, foam, or another approved cushion.
- Include the manual and warranty information.
- Seal the retail box.
- Apply model and batch labels.
- Pack shipping cartons.
- Perform drop or vibration tests on packaging samples.
The package should explain key safe-use rules, such as keeping the toaster away from water, not inserting metal objects, cleaning crumbs, and unplugging the appliance before cleaning.
Shipping tests should represent the expected distribution route. A package that survives a gentle warehouse move may fail after repeated drops, vibration, or compression during parcel delivery.
Quality Problems That Can Stop Production
Manufacturing problems often appear as symptoms during inspection or customer use. The table below shows common causes and useful factory checks.
| Symptom | Possible cause | Useful check |
|---|---|---|
| Toaster does not heat | Open heater, switch fault, broken wire, failed control | Continuity and functional test |
| Carriage will not stay down | Latch or solenoid misalignment | Check engagement and actuator position |
| Toast is uneven | Element spacing, bread position, or airflow problem | Inspect heating layout and carriage alignment |
| Exterior becomes too hot | Poor shielding, excess power, or blocked airflow | Measure surface temperature under defined conditions |
| Burning smell | Residue, overheated insulation, or foreign material | Inspect first-cycle process and wire routing |
| Breaker trips | Short circuit, wrong heater resistance, or insulation failure | Isolate with controlled electrical testing |
| Lever feels rough | Burrs, bent guides, or excessive spring force | Inspect carriage movement and metal edges |
| Crumbs collect in hot areas | Poor tray design or blocked openings | Review crumb path and cleanability |
If a safety-related failure appears, production should stop for the affected lot until the cause is understood. Rework instructions must be documented and validated. A worker should not improvise a wire route, substitute an unapproved component, or bypass a protective device.
Manufacturing Variables That Affect Cost and Performance
Toaster cost does not depend on one part alone. It reflects materials, tooling, assembly time, testing, packaging, warranty risk, and production volume.
| Design choice | Likely benefit | Trade-off |
|---|---|---|
| More stainless steel | Durable appearance and corrosion resistance | Higher material and forming cost |
| More electronic controls | More features and user settings | More parts and software or board testing |
| Higher power rating | Faster heating potential | Higher current, heat, and component demands |
| Thicker insulation | Lower heat transfer | More space and material cost |
| Automated assembly | Repeatable high-volume production | Tooling and setup cost |
| Manual assembly | Flexible for small runs | Greater variation risk |
| Larger crumb tray | Easier cleaning | More housing space |
| Wider slots | Supports thicker foods | Can change heat distribution and cost |
A useful production decision is whether a feature improves the main task enough to justify its cost and failure risk. For example, a complex display may add little value if the main goal is reliable browning with simple controls.
The factory should also measure process capability for important dimensions, such as slot width, carriage position, heater resistance, and terminal placement. Stable processes reduce inspection burden and lower the chance of defects reaching customers.
Common Mistakes to Avoid
Several mistakes create avoidable safety or quality problems:
- Using wire based only on its size without checking its temperature rating.
- Placing plastic too close to the heating element.
- Leaving sharp stamped edges near electrical insulation.
- Routing wires beside moving parts.
- Relying on a single timer without a safe failure response.
- Skipping insulation and leakage tests.
- Treating a cosmetic inspection as a safety inspection.
- Changing a supplier material without rechecking the design.
- Using a different heater resistance without reviewing power and temperature.
- Adding a certification mark without formal authorization.
- Packaging the product before it has cooled or passed inspection.
- Failing to keep batch records for recalls and corrective action.
A toaster should not be designed so that the user must insert tools to remove normal crumbs or stuck bread. The design should support safe cleaning without exposing the user to live or hot parts.
Can You Manufacture a Toaster at Home?
A person can study toaster mechanisms or build a low-voltage heating demonstration, but building a household toaster for use on a U.S. wall outlet is not a safe beginner project. The appliance combines high current, high heat, exposed metal, combustible crumbs, and moving parts.
A home-built unit may lack:
- Proper insulation
- Grounding or double-insulation protection
- Thermal cutoff protection
- Flame-resistant materials
- Reliable strain relief
- Dielectric testing
- Leakage-current testing
- Validated abnormal-operation performance
- A compliant cord and plug
- Enclosure temperature control
Do not operate a homemade toaster from household mains unless the design has been engineered and tested by qualified professionals using appropriate equipment. For education, use a commercially designed low-voltage heating kit or simulate the control system without creating a live heating appliance.
Frequently Asked Questions
What metal is used in toaster heating elements?
Toaster heating elements are commonly made from nichrome, a nickel-chromium resistance alloy. The exact alloy, wire diameter, resistance, and operating temperature depend on the design.
How long does it take to manufacture a toaster?
The factory assembly time may be short, but the full manufacturing process also includes design, tooling, supplier qualification, testing, certification, pilot production, and packaging validation. A new toaster model can take much longer to launch than the final assembly time suggests.
What is the most important toaster safety test?
No single test proves overall safety. Electrical insulation, leakage, grounding where applicable, thermal performance, abnormal-operation behavior, mechanical durability, and functional tests work together.
Why does a toaster need a thermal fuse?
A thermal fuse can permanently open the circuit if a dangerous temperature is reached. It is a backup protection device, not a replacement for correct heater design, airflow, control, or assembly.
Can a toaster use any 120-volt power cord?
No. The cord set must be suitable for the appliance’s current, temperature exposure, mechanical movement, plug configuration, and applicable certification requirements. Replacing it with an unapproved cord can create a serious hazard.
How are toaster heating elements tested?
Factories commonly measure resistance, inspect spacing and support, check electrical insulation, and run controlled functional or thermal tests. The exact test plan depends on the product design and applicable standard.
Key Takeaways
- A toaster combines resistance heaters, insulation, metal frames, controls, a carriage, and thermal protection.
- Nichrome wire is commonly used because it produces controlled heat at high temperature.
- Manufacturing includes design, material qualification, metal forming, heater assembly, wiring, final assembly, testing, certification, and packaging.
- U.S. products must follow applicable safety and labeling requirements, with certification handled through the proper process.
- Electrical and thermal testing are essential because visual inspection cannot find every dangerous defect.
- Home construction of a wall-powered toaster is unsafe without professional engineering and laboratory testing.
Conclusion
To manufacture a toaster safely, a company must control both the heat system and the electrical system from design through shipment. The most reliable process uses qualified materials, repeatable assembly methods, protective devices, documented tests, and traceable production records.
The next practical step is to create a product specification that lists the rated voltage, power, slot dimensions, heater resistance, materials, safety controls, required tests, and U.S. certification path before designing factory tooling.