How To Remove A Toaster Tray: Easy Safe Guide
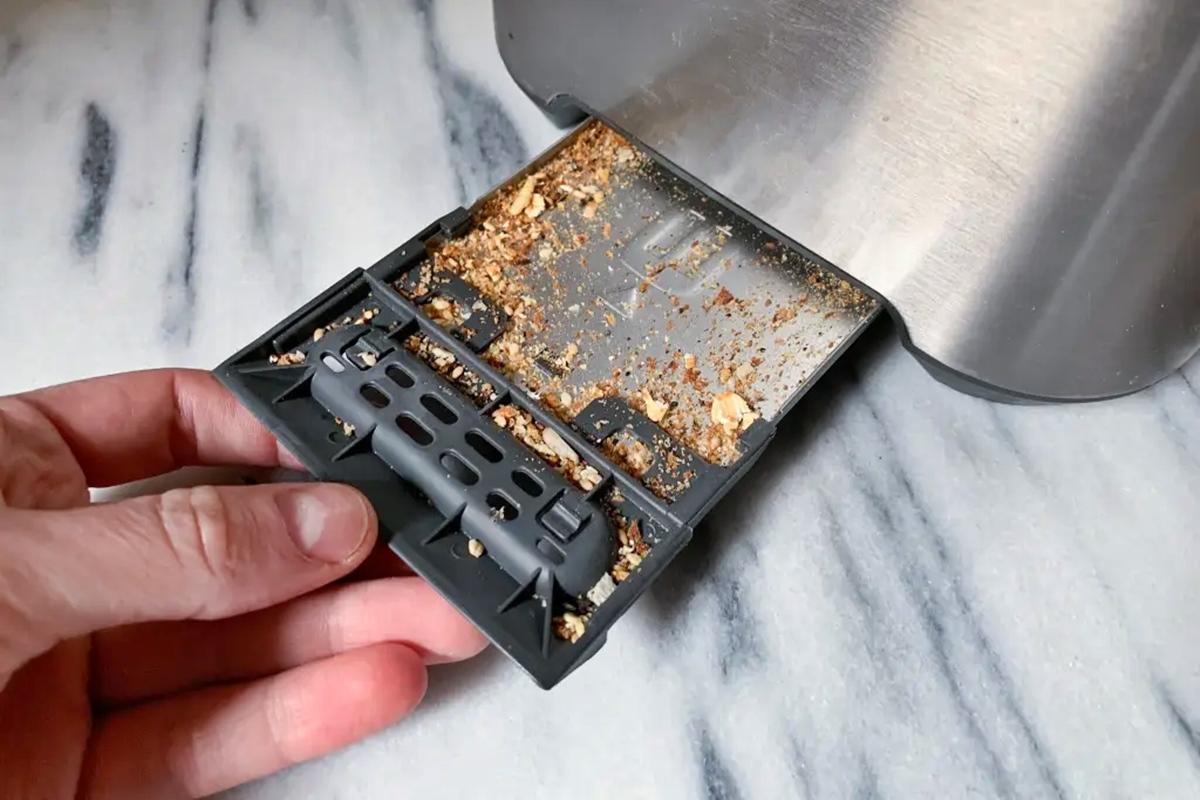
In U.S. kitchens, a toaster tray collects crumbs, flakes, and small bits of food that fall inside the appliance. To remove it, unplug the toaster, let it cool, find the tray near the bottom or rear, and slide or lift it out without forcing it. The exact method depends on whether you have a pop-up toaster or a toaster oven.
First, Identify the Type of Toaster Tray
A crumb tray is a removable part that catches food debris. It is not the same as a cooking rack, baking pan, or broiler tray.
Most countertop toasters sold in the United States use one of these tray designs:
- Rear-slide tray: Pulls out from the back of the toaster.
- Bottom-slide tray: Pulls out from the underside.
- Hinged tray: Opens downward but stays attached to the toaster.
- Toaster oven crumb tray: Slides out from the front, often below the door.
- Fixed interior base: Some small appliances do not have a removable tray.
Look for a small handle, tab, groove, or seam near the bottom. Do not pull on the power cord, lever, slots, heating parts, or outer metal panels.

How to Remove a Pop-Up Toaster Tray
Follow these steps for a standard two-slice or four-slice pop-up toaster.
1. Unplug the toaster
Remove the plug from the wall outlet before touching the tray. Do not rely only on the toaster’s lever or cancel button.
Place the plug on a dry counter where it cannot fall into water.
2. Let the toaster cool
Wait until the outside and inside feel cool. Bread crumbs can remain hot after a toast cycle, and metal parts may hold heat.
If the toaster was smoking or smelled like burned plastic, leave it unplugged and allow it to cool fully before moving it.
3. Find the tray
Check the following areas:
- The back of the toaster.
- The underside near the rear edge.
- The front edge below the control panel.
- The area marked with a crumb or tray symbol.
A rear tray often has a small tab that looks like a flat metal or plastic handle.
4. Release any latch
Some trays lock in place. Press the tab, lift the handle slightly, or move the latch in the direction shown by the label.
Do not use a knife or screwdriver to pry the tray open. A sharp tool can damage the tray, insulation, wiring, or finish.
5. Slide the tray out slowly
Keep the tray level as you pull it. Move it straight out rather than twisting it from side to side.
If the tray stops, check for a latch or a crumb lodged in the track. Stop if the metal bends or the plastic begins to crack.
6. Empty and clean the tray
Shake loose crumbs into a trash can. Wash the tray with warm water and mild dish soap if the manufacturer allows it.
Dry the tray completely before putting it back. Water inside a toaster can create an electrical hazard.
7. Reinstall the tray
Slide the tray into its guides until it sits flush with the toaster. If the tray has a latch, make sure it clicks or rests in its normal locked position.
Do not use the toaster without its crumb tray if the manual says the tray must remain installed.

How to Remove a Hinged Toaster Tray
A hinged tray does not fully separate from the toaster. It usually folds down for cleaning.
- Unplug the toaster and let it cool.
- Find the tray at the bottom or rear.
- Pull the small handle or tab.
- Lower the tray gently.
- Brush or shake out the crumbs.
- Wipe the tray with a slightly damp cloth.
- Close it until it sits flat.
Do not yank a hinged tray. Its hinge can bend, and the tray may no longer close correctly.
Some hinged trays are designed for dry cleaning only. Check the owner’s manual before using water.

How to Remove a Toaster Oven Crumb Tray
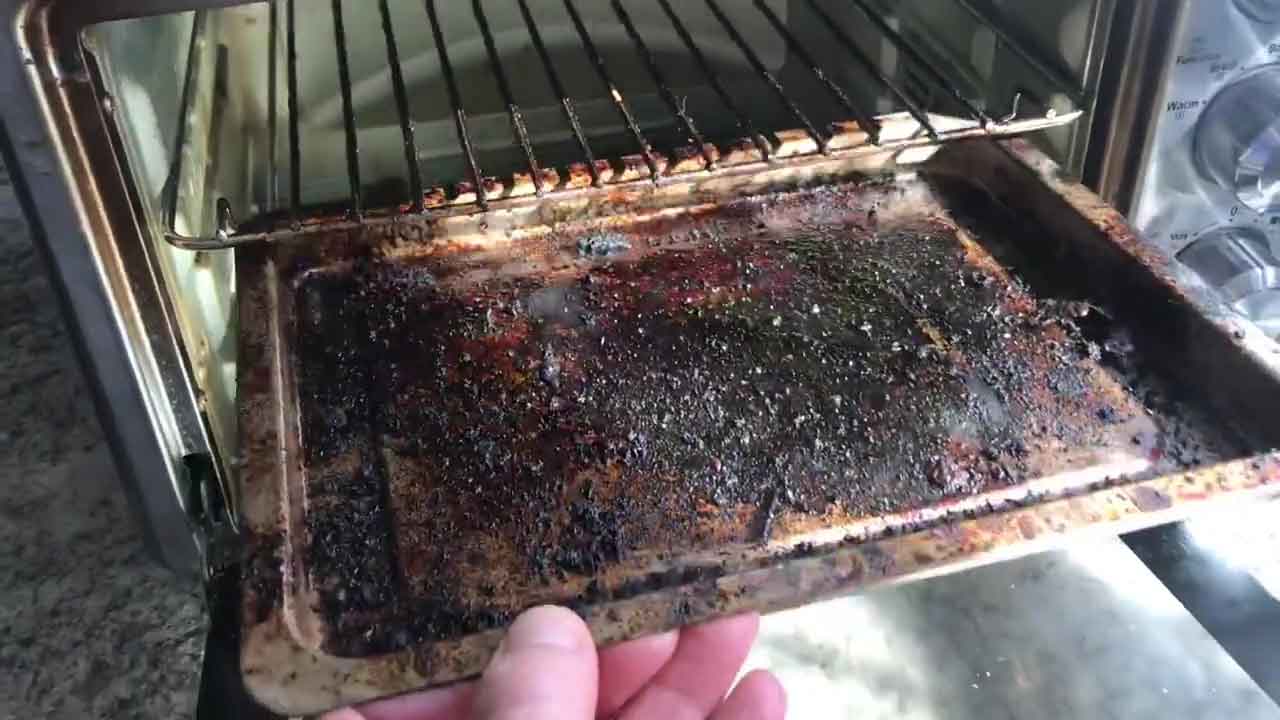
A toaster oven usually has a larger crumb tray below the oven rack. It may slide out from the front when the door is open.
- Turn the toaster oven off.
- Unplug it from the wall.
- Wait until the oven, rack, pan, and tray are cool.
- Open the door.
- Find the tray below the rack or heating area.
- Pull the tray toward you using its front lip or handle.
- Empty the crumbs.
- Clean and dry the tray as directed by the manual.
- Slide it back into the same position.
Do not confuse the crumb tray with the baking pan. A baking pan may be safe to wash in a sink, while a tray with a special coating may need gentler care.
Avoid placing foil on the crumb tray unless the manufacturer specifically permits it. Foil can affect heat flow and may touch heating elements in some designs.

What to Do If the Tray Will Not Come Out
A stuck tray usually has a simple cause, such as a latch, bent edge, or compacted crumbs. Use this order of checks.
Check for a hidden latch
Look for a tab, printed arrow, or small release button. Some trays must be lifted slightly before they slide.
Remove loose crumbs
With the toaster unplugged and cool, turn it over above a trash can and shake it gently. Do not hit the toaster against a counter.
This may free crumbs blocking the tray’s path.
Check for a bent tray
A tray can bend if someone pushes it in at an angle. Compare both sides. If one edge is raised, do not force it through the opening.
A bent metal tray may scratch the housing or damage its track.
Read the correct manual
Search for the brand, model number, and words such as “crumb tray removal.” The model number may appear on a label on the bottom, back, or side of the appliance.
Manufacturer instructions take priority because tray designs differ.
Stop if resistance remains
Do not use pliers, a knife, or a screwdriver. If the tray still will not move, contact the manufacturer or an appliance repair service.
Forcing the tray can expose electrical parts or leave the appliance unsafe to use.

How to Clean a Toaster Tray
A dry brush is the safest first choice for most toaster trays.
For light crumbs
- Hold the tray over a trash can.
- Brush crumbs away with a soft, dry brush.
- Wipe the surface with a dry cloth.
- Check the tray guides before reinstalling it.
For grease or stuck food
If the manual permits washing:
- Soak the tray briefly in warm water.
- Use mild dish soap and a soft sponge.
- Avoid steel wool and harsh scouring pads.
- Rinse away soap.
- Dry every surface before replacement.
Do not immerse the toaster itself in water. Never spray cleaner into the slots, heating chamber, controls, or electrical openings.
A damp cloth is often better than soaking a tray with a nonstick coating, painted surface, or electrical contact.

Signs You Removed and Replaced the Tray Correctly
The tray is likely installed correctly when:
- It slides in without force.
- It sits level with the toaster body.
- The latch or handle rests in its normal position.
- No part of the tray blocks the slots, door, or controls.
- The toaster does not wobble because of a misaligned tray.
- No crumbs or loose parts remain near the heating elements.
Before normal use, inspect the cord and plug. Do not use the toaster if the cord is damaged, the plug is loose, or the appliance shows signs of overheating.
Common Mistakes to Avoid
Pulling the tray while the toaster is plugged in
A toaster can still contain live electrical parts while it is connected to an outlet. Unplugging first reduces the risk of shock and accidental operation.
Removing the tray while it is hot
Hot crumbs and metal can cause burns. Cooling also makes stuck crumbs easier to remove without rushing.
Turning the toaster upside down over a sink
Crumbs can fall into the slots, and water can enter the appliance. Use a trash can or dry work area instead.
Prying with a metal tool
A tool can scratch the casing, bend the tray, or contact internal wiring. Use only the release method shown by the manufacturer.
Putting a wet tray back
Moisture can remain in seams and guides. Dry the tray fully before reinstalling it.
Using foil without checking the manual
Foil may interfere with airflow or contact hot parts. Follow the instructions for the specific model.

Pop-Up Toaster vs. Toaster Oven Tray
Use this quick comparison to choose the right method.
| Appliance type | Usual tray location | Typical removal method | Main caution |
|---|---|---|---|
| Two-slice pop-up toaster | Rear or bottom | Slide or lift a tab | Do not pry the housing |
| Four-slice pop-up toaster | Rear or bottom | Slide out or release latch | Keep the tray level |
| Toaster oven | Front, below door | Pull out after opening door | Tray may be hot |
| Compact specialty toaster | Varies | Follow the model manual | Some trays are not removable |
| Hinged-tray toaster | Bottom or rear | Pull down | Do not force the hinge |
The most important difference is that a pop-up toaster tray is often narrow and hidden, while a toaster oven tray is usually wider and visible once the door opens.

When Should You Replace or Stop Using the Toaster?
A dirty tray can be cleaned. A damaged appliance may need service or replacement.
Stop using the toaster and unplug it if you notice:
- Smoke during normal use.
- Repeated sparks.
- A burning plastic smell.
- A damaged cord or plug.
- A tray that will not stay in place.
- Exposed wires or loose internal parts.
- A housing that becomes unusually hot.
- A circuit breaker that trips during use.
The U.S. Consumer Product Safety Commission advises consumers to unplug small appliances when they are not in use and to keep combustible items away from heat sources. Follow the safety instructions supplied with your appliance and the guidance in its owner’s manual.
Key Takeaways
- Unplug the toaster before removing its crumb tray.
- Let the appliance cool completely.
- Look for a rear, bottom, front, or hinged tray.
- Release the latch before pulling.
- Never force a stuck tray or pry it with a sharp tool.
- Clean the tray with a dry brush first.
- If washing is allowed, dry the tray fully before replacing it.
- Stop using the appliance if it smokes, sparks, smells like burning plastic, or has damaged wiring.
Frequently Asked Questions
Can I remove a toaster tray while the toaster is plugged in?
No. Unplug the toaster first. This prevents accidental operation and reduces electrical risk while you handle the tray.
Why is my toaster tray stuck?
A hidden latch, compacted crumbs, a bent tray, or an incorrect removal angle may be responsible. Check the manual and stop if the tray needs force.
Can I wash a toaster crumb tray?
Often, yes, but check the owner’s manual first. Use mild soap, avoid abrasive tools, and dry the tray completely before putting it back.
Can I use a toaster without the crumb tray?
Only if the manufacturer says it is safe. The tray helps contain crumbs and may be part of the appliance’s intended operation.
How often should I clean the toaster tray?
Clean it when crumbs build up and whenever food debris becomes visible. Frequent use, crumb-heavy bread, and pastries may require more frequent cleaning.
What should I do if crumbs are inside the toaster?
Unplug the toaster, let it cool, and empty loose crumbs over a trash can. Do not pour water into the toaster or insert tools into the slots.
Sources and Further Reading
- U.S. Consumer Product Safety Commission: Small Appliance Safety
- National Fire Protection Association: Cooking Safety
- The owner’s manual for the exact toaster brand and model
Conclusion
To remove a toaster tray, unplug the appliance, let it cool, locate the tray, release its latch if needed, and slide or fold it out gently. Clean it with a dry brush or the method approved in the manual, then dry it fully before replacing it.
If the tray does not move with light pressure, stop and check the model instructions. A stuck tray is safer to inspect than to force.