Green Life Rice Cooker Buttons Not Working [Common Causes]
If your Green Life rice cooker buttons are not working, don’t panic. Most of the time, this issue is caused by simple moisture buildup or a tripped sensor that you can easily reset at home. By following our guide, you can identify if it is a simple hardware glitch or a deeper electrical fault.
There is nothing quite as frustrating as coming home hungry, ready to whip up a batch of fluffy jasmine rice, only to find that your Green Life rice cooker buttons are not working. You press the “Cook” button, and… nothing happens.
The screen stays dark, or the light refuses to blink. It feels like your kitchen gadget has suddenly gone on strike, leaving you wondering if you need to order takeout or if you can actually salvage your dinner.
In 2026, many of us rely on our smart kitchen appliances to save time. When these machines act up, it is easy to assume they are broken for good. However, more often than not, a Green Life rice cooker button not working is a minor hiccup rather than a total hardware failure.
Before you throw it in the bin, let’s walk through the steps to get your cooker running like new again. We will explore the common reasons why these buttons might fail and how you can troubleshoot the problem quickly.
Key Takeaways
- Moisture Issues: Water or steam entering the control panel is the most frequent cause of unresponsive buttons.
- The Reset Method: Unplugging your device for ten minutes often clears temporary logic board errors.
- Cleanliness Matters: Food debris or sticky residue under the buttons can physically obstruct the contact point.
- Safety First: Never attempt to open the main housing of your cooker if it is still plugged into a power source.
- Sensor Calibration: If the unit won’t start, check if the inner pot is properly seated to trigger the bottom safety sensor.
- Professional Repair: If the unit is under warranty, contact the manufacturer instead of attempting internal DIY repairs.
Common Causes for Unresponsive Buttons
To understand why your buttons might be acting up, it helps to look at how these machines function. Green Life cookers use a capacitive or membrane-style control panel. These panels are sensitive to the environment, especially the humid atmosphere of a kitchen.
Moisture and Steam Interference
The number one enemy of any electronic kitchen appliance is moisture. Even if your cooker looks dry on the outside, steam from cooking sessions can sometimes seep into the small gaps around the buttons. This humidity can cause a short circuit in the underlying ribbon cable. When moisture is trapped, the controller may interpret a “ghost touch” or, conversely, ignore your intentional button presses entirely.
The Role of Food Debris
We all have messy cooking days. Sometimes, a splash of sauce or a stray bit of starch ends up on the control panel. Over time, this dries into a sticky film. If this residue seeps into the edges of the button housing, it acts as a mechanical barrier. The button may be physically depressed, but the electrical contact beneath it isn’t being triggered properly.
The Universal Reset Procedure
Before you get out your screwdriver, try the digital reset. Much like a computer, the internal circuit board of your Green Life rice cooker can get “stuck” due to a voltage spike or a minor power surge from your home grid. Resetting the logic is a simple process that solves the “Green Life rice cooker buttons not working” issue for many users.

Visual guide about Green Life Rice Cooker Buttons Not Working
Image source: expertreviewsbestricecooker.com
Power Cycling Your Device
First, unplug the unit from the wall outlet. Don’t just turn it off; physically remove the plug. Wait for at least ten minutes. This allows the internal capacitors to fully discharge. Once you plug it back in, the system should perform a fresh boot-up sequence. This is the most effective way to clear a temporary error code that might be locking your buttons.
Check the Power Cord Connection
Sometimes the problem isn’t the button itself, but the power supply to the control board. Ensure that the cord is firmly seated in the back of the rice cooker. If the cord is loose, the unit might receive just enough power to flicker but not enough to register a button press.
Internal Sensor Safety Checks
Did you know your rice cooker has a built-in safety sensor? If the device thinks the inner pot is missing or incorrectly placed, it will often disable the control panel buttons to prevent the heating element from burning out. This is a deliberate safety feature, not a malfunction.
Is the Inner Pot Seated Correctly?
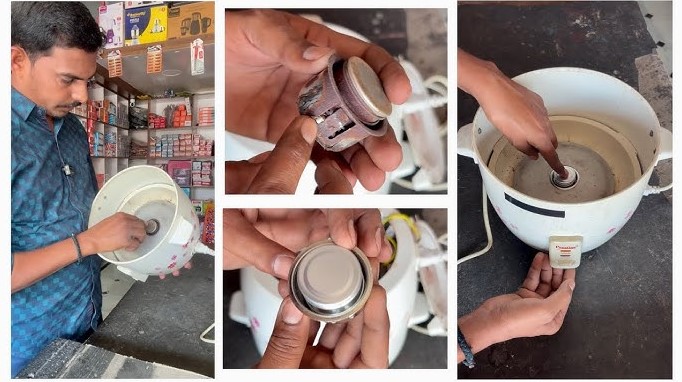
Lift the inner pot out and look at the bottom of the heating chamber. Is there debris, a grain of rice, or a dried liquid spill on the pressure sensor plate? If the weight of the pot doesn’t push that center sensor down firmly, the cooker will refuse to start. Clean the heating element surface and the bottom of the pot with a soft, dry cloth. Once the pot sits perfectly flush, try the buttons again.
Looking for Bent Components
If you dropped your inner pot, it might be slightly dented. A dented pot cannot make proper contact with the sensors at the bottom of the cooker. If the sensor is not triggered, the machine enters a “locked” state. Check the rim of your pot to see if it is perfectly circular and free of warps.
When and How to Clean the Control Panel
If the electronics are dry and the pot is seated correctly, it’s time to focus on the interface. A dirty button is a non-functioning button. Regular maintenance ensures that your appliance stays responsive over many years of use.
Cleaning Safely Without Damaging Electronics
Use a very lightly dampened microfiber cloth not a soaking wet sponge. Wipe the surface of the buttons to remove any grime. If there is sticky residue, use a tiny amount of rubbing alcohol on a cotton swab.
Gently trace the edge of the buttons. This helps break down oils that might be keeping the button stuck in a depressed position. Never use harsh chemicals or abrasive scrubs, as these will damage the finish of the panel.
Avoiding Future Moisture Buildup
To keep your buttons working, try to position your rice cooker away from the direct path of steam vents. If you keep the cooker under a cabinet, the trapped steam can condense on the control panel. Pulling it forward during the cooking process is a small step that significantly improves the lifespan of your electronic components.
Troubleshooting Electrical Failure
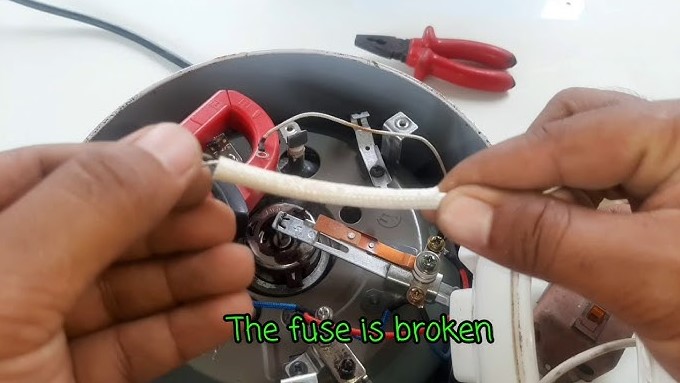
If you have tried the reset, cleaned the surface, and checked the sensors, but your Green Life rice cooker buttons are still not working, there is a possibility of a deeper electrical issue. This is when you need to be very careful about your next steps.
Checking for Tripped GFCI Outlets
Modern kitchens are equipped with GFCI (Ground Fault Circuit Interrupter) outlets. If there was a tiny electrical spike, the outlet itself might have tripped. Try plugging a small lamp into the same outlet. If the lamp doesn’t turn on, you need to reset the outlet breaker button on the wall plate, not the rice cooker itself.
When to Call a Professional
If you are within your warranty period, do not attempt to open the casing. Removing the screws will void your warranty and could be dangerous. Contact the manufacturer’s support team directly. They have access to specific wiring diagrams and replacement parts that aren’t available to the general public. If the warranty is expired, look for a local small appliance repair shop. They are often cheaper than replacing the entire unit.
Conclusion: Getting Back to Perfectly Cooked Rice
Dealing with a kitchen appliance that won’t cooperate is always a headache, but when you find your Green Life rice cooker buttons are not working, the solution is usually within reach.
By focusing on simple fixes like power cycling, cleaning, and verifying your pot placement, you can save yourself a trip to the store and get back to cooking. Remember, these machines are built to last, but they appreciate a little bit of care and attention to detail.
We hope this guide helped you resolve your rice cooker woes. Whether it was just a bit of stray rice blocking the sensor or a digital glitch that needed a quick rest, you now have the tools to keep your kitchen running smoothly. Happy cooking, and may your rice always turn out perfectly fluffy!
Frequently Asked Questions
Why does my rice cooker display light up but the buttons don’t react?
This often happens when the control panel has developed a “sticky” residue or if there is moisture trapped beneath the membrane. Try cleaning the interface with a dry, soft cloth and ensuring your fingers are completely dry before pressing any buttons.
Can I use a hairdryer to dry out the control panel?
While you can use a hairdryer on a “cool” setting to remove surface moisture, avoid using heat. Excessive heat can warp the plastic housing or damage the delicate internal ribbon cables attached to the buttons.
How do I know if my rice cooker is still under warranty?
Check the bottom of the device for a serial number and contact the manufacturer’s customer support website. Most Green Life appliances come with a limited one-year warranty, so have your receipt or order confirmation ready.
What if the “Cook” light is blinking but the machine isn’t heating?
A blinking light without heat usually indicates that the unit is in a “Delay” or “Timer” mode, or that the sensor does not detect the inner pot. Ensure the pot is clean, dry on the outside, and properly inserted into the base.
Is it safe to open the rice cooker to check the wiring?
It is generally not recommended to open the housing unless you have experience with small appliance electronics. There are high-voltage components inside that can remain charged even when unplugged, posing a safety risk.
Why do buttons sometimes work intermittently?
Intermittent functionality is often a sign of a loose internal connection or physical obstruction. If the buttons only work when pressed at a specific angle, there is likely debris trapped inside the mechanism that needs professional cleaning.