How To Replace A Toaster Cord: Safe DIY Guide
Replacing a toaster cord is possible only when the toaster is designed for cord repair and you have basic electrical repair skills. In the United States, unplug the toaster first, use a replacement cord with the same or higher voltage, current, temperature, and insulation rating, and follow the toaster maker’s service instructions. If the cord is molded into the appliance, the toaster shows burn damage, or you cannot verify the wiring, replace the toaster or use a qualified appliance repair technician.

Before You Replace the Cord: Decide if Repair Is Safe
A damaged toaster cord can cause electric shock, burns, fire, or damage to the outlet. The U.S. Consumer Product Safety Commission advises consumers to stop using appliances with damaged power cords. Do not keep using a toaster with cracked insulation, exposed wire, melted plastic, scorch marks, or a loose plug.
A toaster may be a reasonable repair project when:
- The toaster is unplugged and fully cool.
- The cord is a separate, replaceable part.
- The plug or cord damage is limited and did not involve overheating.
- The case, wiring, terminals, and strain relief are in good condition.
- You can identify the correct replacement cord.
- You can make and check secure electrical connections.
Do not replace the cord yourself when:
- The cord is molded into the toaster.
- The plug has melted or shows black marks.
- The toaster smells burnt.
- The case is cracked or warped.
- Internal wires are brittle, scorched, or loose.
- A circuit breaker or GFCI trips when the toaster is used.
- You are not sure which wire connects to which terminal.
- You cannot test the finished repair safely.
A cord repair does not fix a damaged heating element, switch, thermostat, timer, or circuit board. A toaster that has overheated may have hidden damage beyond the cord.
Why toaster cord repairs need extra care
A toaster uses high heat and draws substantial current. Its cord must withstand heat near the appliance and carry the toaster’s full electrical load. A thin replacement cord, lamp cord, household wire, or random extension cord may overheat.
The replacement must also preserve:
- Polarity: The hot and neutral conductors must remain connected to the correct terminals.
- Strain relief: Pulls on the cord must not reach the internal terminals.
- Insulation: The cord must suit the heat and voltage near the toaster.
- Grounding: A grounded toaster must retain its grounding path.
- Mechanical protection: The cord must not rub against sharp metal or hot parts.
For U.S. products, check the nameplate for the voltage and current rating. Many household toasters use 120 volts AC, but the rating on your toaster controls the repair. Never assume that every toaster has the same electrical design.

Identify the Correct Replacement Cord
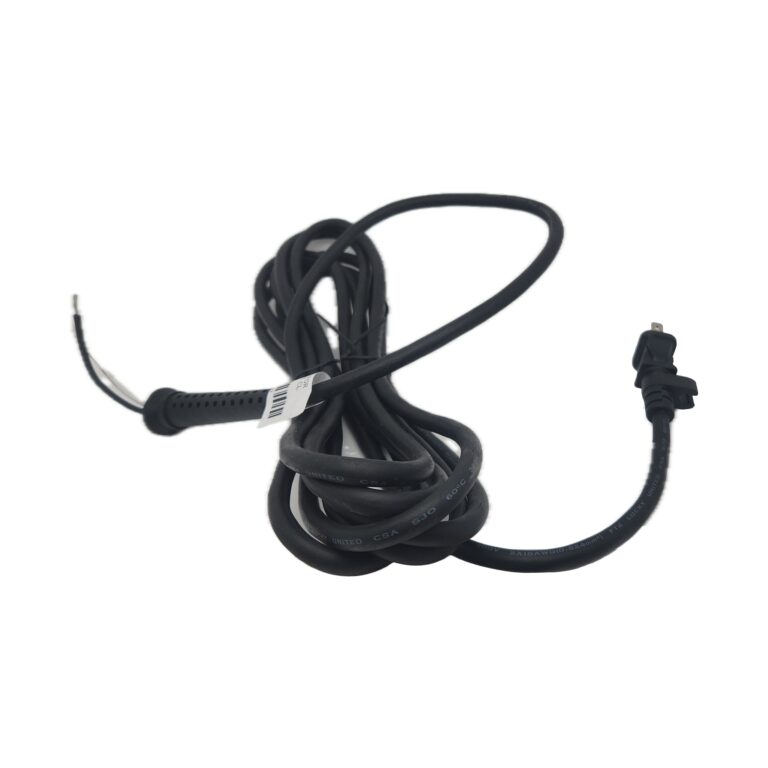
The correct toaster replacement cord must match the original cord’s electrical and physical requirements. The safest source is the toaster manufacturer, an authorized repair center, or a replacement part listed for the exact model.
Look for these details:
| Detail | What to check |
|---|---|
| Voltage | The replacement cord must be rated for the toaster’s supply voltage. |
| Current | The cord must carry at least the toaster’s rated current. |
| Temperature | Use an appliance cord suitable for the heat at the cord entry point. |
| Plug type | Match the original two-prong or three-prong plug and its polarity. |
| Wire size | Match the original conductor size or use the manufacturer’s specified size. |
| Length | Use the original length or a manufacturer-approved length. |
| End termination | Match the original terminals, crimp ends, or connector style. |
| Strain relief | Use the correct bushing, clamp, or molded relief. |
| Certification | Prefer a listed or recognized replacement part from a reliable source. |
Read the toaster nameplate
The nameplate is often on the bottom, back, or side of the toaster. It may show:
- Manufacturer and model number
- Voltage
- Wattage
- Frequency
- Amperage
- Grounding information
You can estimate current with this formula:
Current in amps = wattage ÷ voltage
For example, a hypothetical 1,500-watt toaster on a 120-volt U.S. circuit draws about 12.5 amps:
1,500 ÷ 120 = 12.5 amps
This calculation helps you understand the load. It does not replace the manufacturer’s cord specification.
Match the original plug
A polarized two-prong plug has one wider blade. The wider blade is neutral. The narrower blade is hot. The replacement must preserve this arrangement.
A three-prong plug includes a grounding pin. Never remove the grounding pin to make the plug fit a two-slot outlet. Never replace a three-wire grounded cord with a two-wire cord unless the manufacturer’s instructions specifically permit that design.
Do not use:
- Lamp cord
- Speaker wire
- Flat household cord without the correct appliance rating
- An extension cord as a permanent replacement
- A cord with a lower current or temperature rating
- A cord that has no secure strain relief

Tools and Parts You May Need
Gather the parts before opening the toaster. Do not open the appliance just to measure the cord and then guess at the replacement.
You may need:
- The correct replacement cord
- The toaster’s service manual, if available
- Phillips, slotted, or security screwdrivers
- Nut drivers or small sockets
- Needle-nose pliers
- Wire cutters and strippers, if approved by the repair method
- A crimping tool
- Correct insulated terminals or wire connectors
- Heat-resistant sleeving, only if specified
- A multimeter with continuity and resistance functions
- A camera or phone for recording wire locations
- Safety glasses
- A clean, nonconductive work surface
A multimeter can help check continuity and shorts, but it does not prove that a repair is safe under operating load. If you do not know how to use one, stop before opening the toaster.

How to Replace a Toaster Cord Step by Step
The exact construction differs by model. Use the following method only when the replacement cord is a separate, serviceable part and the toaster’s design matches the steps.
1. Unplug and cool the toaster
Unplug the toaster from the wall. Do not rely on the lever being up or the toaster being switched off.
Let the toaster cool completely. Remove the crumb tray and empty loose crumbs. Keep the toaster away from water. Never work on it beside a sink or on a wet counter.
2. Record the original wiring
Before disconnecting anything, take clear photos of:
- The cord entry point
- The hot and neutral terminals
- The ground connection, if present
- Any wire routing
- The strain-relief clamp or bushing
- Screws, clips, and insulating barriers
Mark the wires if needed. A photo is useful, but it is not a substitute for the wiring diagram or service manual.
3. Remove the outer case
Place the toaster upside down on a protected work surface. Remove only the screws needed to access the cord connection.
Some toaster cases use hidden screws, security screws, clips, or parts that release only in a certain order. Do not force the case. Bending the shell can change the distance between live wiring and the metal housing.
Keep screws in a small container. Do not operate the toaster while its case is open.
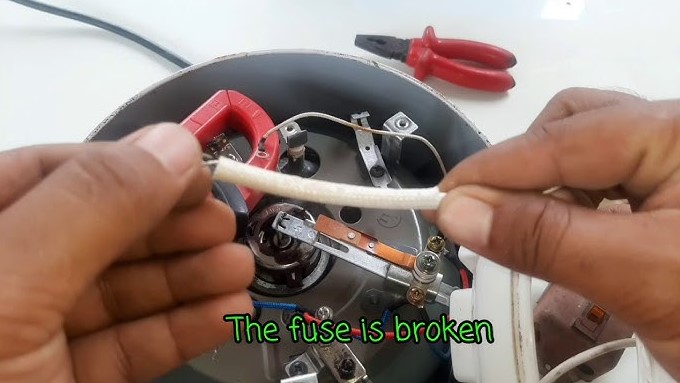
4. Inspect the inside before touching the cord
Look for:
- Burned terminals
- Loose connectors
- Melted insulation
- Discolored metal
- Broken ceramic supports
- Damaged switches
- Frayed internal wires
- Crumb buildup near electrical parts
- Signs of moisture or corrosion
Stop if you find heat damage beyond the cord. A new cord will not make a burned toaster safe.
5. Release the strain relief
The strain relief keeps the cord from pulling on the internal connections. It may be a clamp, molded bushing, spring clip, or plastic fitting.
Remove it without damaging the toaster shell or the replacement cord. Never pull the old cord through the case while it is still connected to internal terminals.
A replacement cord without the correct strain relief is not complete. The cord can fail again if a small pull transfers force to the terminals.
6. Disconnect the old cord
Disconnect one conductor at a time. Note the original position of each wire.
Depending on the toaster, the wires may attach with:
- Screws
- Push-on terminals
- Crimp connectors
- A terminal block
- A soldered connection
Do not reuse a loose, overheated, or damaged terminal. Do not twist wires together and cover them with electrical tape as a substitute for a proper connector.
If the original connection is soldered, use the manufacturer’s repair instructions. A solder joint in a high-heat, high-current appliance may require specific materials and mechanical support.
7. Install the new cord
Route the replacement cord along the original path. Keep it away from:
- Heating elements
- Sharp metal edges
- Moving controls
- Crumb paths
- Hot internal surfaces
- Places where the case can pinch it
Connect the conductors to the same electrical points as the original cord. On a polarized U.S. cord, the ribbed, marked, or wider-blade conductor is normally neutral. The smooth or unmarked conductor is normally hot. Confirm the design rather than relying only on wire appearance.
If the toaster has a ground wire, attach it to the original grounding point. A ground connection must contact clean metal and remain mechanically secure.
Tighten terminal screws firmly, but do not strip them. If the design uses crimp terminals, use the correct terminal and a proper crimping tool.
8. Refit the strain relief
Install the original or approved replacement strain relief. It should hold the outer jacket of the cord, not the individual inner wires.
Check the cord from the outside. It should not slide freely in and out of the toaster. It should also have no sharp bend at the entry point.
9. Inspect and reassemble the toaster
Before closing the case, check that:
- No loose wire strands are present.
- No conductor is trapped under a case edge.
- Hot and neutral wires cannot touch.
- The ground wire is secure, when applicable.
- Insulating barriers are back in place.
- Terminals do not touch the metal case.
- The cord does not touch the heating elements.
- All screws and clips are installed.
Reassemble the toaster fully. Do not test it with the cover removed.

How to Test the Cord Repair
Test the toaster while it is still unplugged. A multimeter check can find common wiring faults before power is applied.
Continuity test
Set the multimeter to continuity or resistance mode. With the toaster unplugged:
- Check from the narrow plug blade to the expected hot connection.
- Check from the wide plug blade to the expected neutral connection.
- Check the grounding pin to the toaster’s metal grounding point, if the toaster uses a three-prong plug.
- Confirm that the cord is not open or broken.
- Check for an unintended short between hot and neutral.
The exact readings depend on the toaster’s switches, controls, and internal circuit. A toaster may not show a simple continuous path through its heating elements when the controls are off. Use the service manual to interpret the reading.
Physical inspection
Flex the cord gently near the plug and toaster entry point. The reading should not change unexpectedly. Do not bend the cord sharply or pull on it.
Confirm that the plug blades are straight and that the cord jacket does not move in the strain relief.
First power test
Only test the toaster when the case is fully assembled and the repair passes inspection.
Use the toaster in a dry area with a properly wired U.S. outlet. Keep your hands away from the toaster while it operates. Stop immediately if you notice:
- Sparks
- Smoke
- A burning smell
- Crackling
- Heat at the plug
- A tripped breaker
- A tripped GFCI
- Uneven heating
- A cord that becomes hot
Unplug the toaster and do not test it again until the cause is found. Never bypass a breaker or GFCI to keep using the toaster.

Common Toaster Cord Repair Mistakes
The most common mistakes involve the wrong cord, poor strain relief, or reversed connections.
Using a generic cord
A generic cord may fit the plug opening but still lack the needed current, heat, or insulation rating. Physical fit is not proof of electrical compatibility.
Reversing hot and neutral
A toaster may still appear to work when hot and neutral are reversed. That does not make the repair correct. Preserve the original polarity, especially where switches or exposed metal parts are involved.
Omitting the strain relief
Without strain relief, normal movement can loosen the terminals. This can create arcing and heat inside the case.
Replacing a grounded cord with an ungrounded cord
Do not remove a safety ground to simplify the repair. If the appliance was built for a three-prong plug, keep the ground path intact.
Covering damaged wire with tape
Electrical tape can cover insulation damage, but it does not restore a damaged conductor, terminal, plug, or heat rating. Replace the damaged part.
Testing with the case open
An open case can expose live parts and allow wires to move into heating areas. Assemble the toaster before applying power.
Ignoring the original cause
A cord may be damaged because the toaster was stored against a hot surface, pulled from the outlet by the cable, or exposed to liquid. Correct the cause or the new cord may fail too.

Repair or Replace the Toaster?
Replacing the toaster is often the safer choice when the cord is permanently attached or the appliance has additional damage. A cord repair makes less sense when the toaster is old, inexpensive, heavily corroded, or difficult to open without damaging the case.
Choose professional repair when:
- The toaster is a high-end or specialty model.
- The cord is integrated into a control board.
- The internal wiring is scorched.
- You need soldering or electrical diagnosis.
- The toaster trips protection devices.
- You cannot verify the repair with a wiring diagram and meter.
Choose a new toaster when:
- The cord and plug have melted.
- The case is damaged.
- The heating elements are exposed.
- The toaster has repeated electrical faults.
- Replacement parts are unavailable.
- The repair cost approaches the cost of a safe replacement.
Do not place a damaged toaster in household recycling unless your local program accepts small appliances. Follow your city or county disposal rules.

Frequently Asked Questions
Can I replace a toaster cord with an extension cord?
No. An extension cord is not a proper permanent replacement for an appliance cord. Use a cord made for the toaster’s electrical and heat requirements. If you need temporary reach, follow the toaster manual and extension-cord safety guidance, but keep the extension cord fully visible and never use it as an internal replacement.
Can I replace a two-prong toaster cord with a three-prong cord?
Not automatically. A three-prong cord requires a proper grounding path and a suitable connection inside the toaster. Installing a ground pin without a verified ground connection can create a false sense of safety. Follow the manufacturer’s design or ask a qualified repair professional.
Why does my toaster still work after the cord is damaged?
The toaster may continue to heat even when the cord insulation is cracked or the plug is loose. Operation does not show that the cord is safe. Stop using it and repair or replace it before the damage worsens.
What if my toaster cord is permanently attached?
Do not cut off the molded cord and attach a new cord by twisting wires together. A molded cord may be part of the appliance’s safety design. Contact the manufacturer or replace the toaster unless a qualified technician has an approved repair method.
Can I repair only the plug?
A replacement plug may be appropriate for some cord types, but only if the remaining cord is undamaged and the plug is rated for the toaster’s load. If the cord is brittle, burned, cut, or heat-damaged, replace the complete cord instead.
What should I do if the toaster trips the breaker after the repair?
Unplug it and stop testing. The cause may be reversed wiring, a short, damaged insulation, a failed heating element, or a faulty control. Do not reset the breaker repeatedly. Have the toaster inspected or replace it.
Key Takeaways
- Unplug and cool the toaster before any inspection.
- Replace the cord only if the toaster has a serviceable cord and no other damage.
- Match the original voltage, current, temperature, plug, wire, polarity, and strain relief requirements.
- Keep hot, neutral, and ground connections in their original positions.
- Test continuity and inspect the finished repair before applying power.
- Stop and seek qualified help if the toaster is burned, trips protection devices, or has a molded-in cord.
Conclusion
A toaster cord replacement is not just a wire swap. The repair must preserve electrical capacity, polarity, insulation, strain relief, and grounding. If the toaster shows heat damage or the correct cord cannot be identified, replacing the appliance is usually safer than improvising a repair.
For a next step, find the toaster’s model number and service instructions. If they do not identify an approved replacement cord, do not open the toaster; contact the manufacturer or a qualified appliance repair technician.